What the register is
Each date of an event has its own register page. The register is where you see who’s booked, mark attendance, take manual bookings, contact attendees, run the waiting list, and process refunds.
If your event has 12 dates, it has 12 registers — one per date.
Opening a register
You can reach an event register two ways:
- From the events list (Event View): click the Dates button in the row to expand all dates, then click View Register on the date you want.
- From the dashboard: clicking any event in the Events widget on the dashboard takes you straight to that date’s register.
The register URL pattern is /events/register/{event_id}/{date_id}.
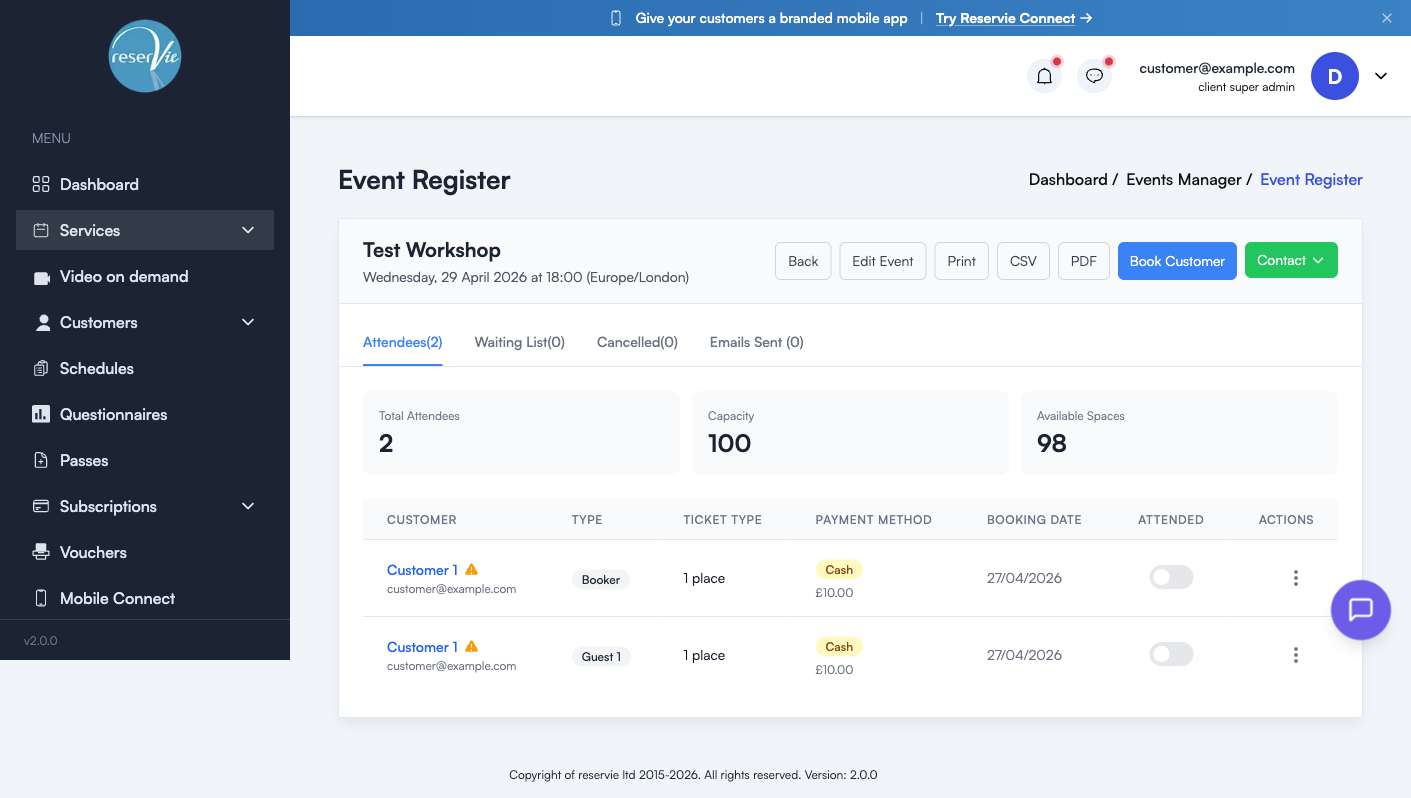
Header — actions for this date
The buttons across the top of the register apply to the date you’re currently viewing.
| Button | What it does |
|---|---|
| Back | Return to the events list |
| Edit Event | Open the event editor for the parent event |
| Print-friendly version of the register | |
| CSV | Download the register as a CSV file |
| Download the register as a PDF file | |
| Book Customer | Manually add a booking for this date (see below) |
| Contact | Send a message to attendees on this date (dropdown of options) |
The four tabs
| Tab | Contents |
|---|---|
| Attendees | Customers booked and confirmed for this date |
| Waiting List | Customers waiting for a space (when the event is full) |
| Cancelled | Bookings that have been cancelled |
| Emails Sent | Audit log of every email reservie has sent for this date |
Each tab title shows a count in brackets, e.g. Attendees (12).
Capacity stats
Above the table, three at-a-glance figures:
| Stat | What it counts |
|---|---|
| Total Attendees | Confirmed bookings on this date |
| Capacity | Maximum places (sum of all pricing tier stocks) |
| Available Spaces | Capacity minus Total Attendees |
The attendees table
| Column | Notes |
|---|---|
| Customer | Name (linked to their profile) and email address |
| Type | Booker / Guest — Booker is the person who paid; Guest is anyone they booked alongside themselves |
| Ticket Type | The pricing tier they bought (e.g. “1 place”, “Standard”, “Concession”) |
| Payment Method | Card / Cash / Pass credit (CR), with the amount charged |
| Booking Date | When they booked |
| Attended | A toggle — flip on to mark the customer as having attended |
| Actions | Per-booking menu (see below) |
Payment status indicators
A small icon next to the payment method shows the payment state:
| State | Meaning |
|---|---|
| Manual | Booked manually (e.g. via Book Customer or as a cash payment) |
| Completed | Stripe payment succeeded — the Stripe icon appears next to it |
| Cancelled | Booking has been cancelled |
| Package | Paid using a pass |
Per-booking actions
The action menu on each row offers:
| Action | What it does |
|---|---|
| Transfer | Move this booking to a different date of the same event |
| Cancel | Cancel the booking. The customer is notified using the cancellation template. |
| Refund | Issue a refund (only available for Stripe-paid bookings) |
Refund tip: refunds go back to the customer’s original card via Stripe, typically within 5–10 working days. The booking is also cancelled and the place is freed up.
Booking a customer manually
Click Book Customer to add a booking on someone’s behalf. Use this when:
- The customer paid you in cash or by bank transfer
- You’re booking by phone or in person
- You’re moving a customer from a different system into reservie
The booking shows up with a Manual payment state. The customer still receives their confirmation email and reminders, just like a self-service booking.
Running a waiting list
If the event is at capacity, customers can opt to join the Waiting List when they try to book (waiting list must be enabled on the event). The customer doesn’t pay until a space opens.
When a space frees up — through a cancellation or a capacity increase — the system emails the next person in line using the Waiting list notification template. They have a configurable window to claim the place; if they don’t, the next person is offered it.
You can also manually promote someone from the waiting list using the action menu on their row.
Contacting attendees
The Contact dropdown lets you send an ad-hoc message to everyone in the current tab. Common uses:
- Reminder before class — for example, “remember to bring a mat”
- Late change — “tonight’s class is starting 15 minutes late”
- Cancellation announcement — when you have to call off a date
The message goes through reservie’s email system and is recorded in the Emails Sent tab so you can confirm what went out and to whom.
Exporting the register
For attendance lists, accountancy records, or printed paper copies:
| Option | When to use it |
|---|---|
| Quick paper register for the room | |
| CSV | Importing into a spreadsheet, or for accounting reconciliation |
| A clean shareable copy |
All exports include the customer name, email, ticket type, payment method, booking date, and attended status.
Common scenarios
”A customer paid in cash — how do I record it?”
Click Book Customer, choose the customer (or create a new profile), select the ticket tier, and choose Cash as the payment method. The booking appears as Manual.
”Someone needs to swap to a different date”
On their row, Actions → Transfer, then pick the new date of the same event. They keep their place and ticket type; no refund is issued.
”I need to cancel one date and refund everyone”
For each booking on the date: Actions → Refund. Then either Edit Event to remove the date, or use Contact to message everyone explaining the change before you cancel.
”How do I see what emails went out?”
Open the Emails Sent tab. Every notification sent for this date is logged with timestamp, recipient, and template name.